Table of Contents |
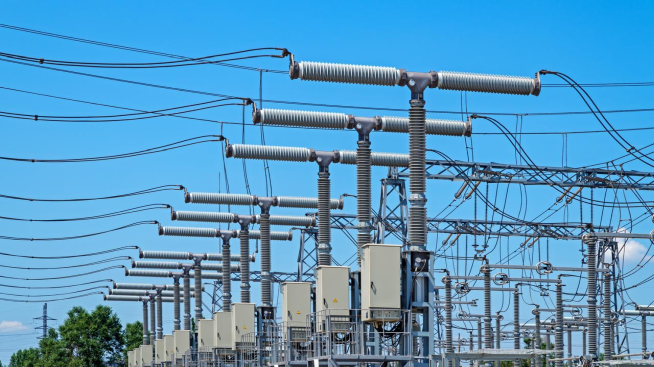
The NXU-IIG Surge Arrester is a critical component for electrical systems. It protects them from various hazards. These include sudden voltage spikes and transient surges. These devices protect sensitive electronic equipment well. They offer protection from potential damage caused by unexpected electrical disturbances. This comprehensive guide provides a step-by-step approach to installing this surge arrester in a transformer safely and correctly.
Pre-Installation Preparation
Before starting, disconnect the power supply. The first step is to shut main the circuit breaker off. Wearing appropriate personal protective equipment is also recommended. These include insulating gloves and safety goggles. They offer effective protection against potential electrical hazards.
Necessary Tools
You’ll need a specific set of tools for successfully installing a surge arrester in the transformer. Gather these:
- Wire strippers
- Crimping tools
- Wire lug
- Flathead and electric screwdrivers
- Multimeter
- Torque screwdriver
- Protective gloves and safety glasses
Lastly, carefully review the surge arrest product instructions. Verify the NXU-IIG model’s compatibility with your specific electrical system. Check the technical specifications to ensure you have the correct version for your application.
Mounting the NXU-IIG Surge Arrester
Mounting the surge arrester in transformer is a straightforward process. Following the manufacturer’s guidelines is key. Here are the steps:
- Align the upper end of the surge arrest device with the DIN rail’s top edge.
- Gently press down on the bottom edge.
- Ensure the bottom latch securely engages with the DIN rail.
- Confirm the arrester is firmly and evenly positioned.
If removal/dismantling becomes necessary, push upward on the bottom of the arrester, slightly lift the top, and carefully detach it from the DIN rail.

Wiring the Surge Arrester
Wire selection is critical for surge arresters. It depends on the product’s current rating. The following table provides guidance for wire selection based on different specifications:
Specification |
Wire Type |
Copper Cross-Sectional Area (mm²) |
L and N Incoming Lines (20, 40 kA) |
Power Lines |
4 |
L and N Incoming Lines (60 kA) |
Power Lines |
6 |
L and N Incoming Lines (100 kA) |
Power Lines |
10 |
Ground Line (20, 40 kA) |
Ground Wire |
6 |
Ground Line (65 kA) |
Ground Wire |
10 |
Ground Line (100 kA) |
Ground Wire |
16 |
Next, prepare the wires. Carefully strip approximately 12 millimeters of insulation. Use crimping pliers to attach wire lugs. Make sure they are attached securely. When connecting, use a high-quality torque screwdriver. Set the torque value to 2.0 N.m. This will ensure a stable connection.
It’s recommended to always follow the electrical wiring diagram and comply with local electrical regulations during installation. This will ensure safe, optimal, and successful installation.
Post-Installation Checks and Maintenance
Environmental conditions play a crucial role in the NXU-IIG Surge Arrester’s performance. Check the ambient temperature within the manufacturer’s range. Monitor humidity levels too. Also, evaluate the area for potential corrosive elements like industrial chemicals, salt air, or excessive dust. These might compromise the arrester’s functionality.
The degradation indication window serves as the health indicator of surge arresters. When the window turns red, it signals the protection module has reached the end of its effective life. This color change indicates significant internal wear that compromises the arrester’s protective capabilities. Immediate replacement is essential to maintain your equipment’s safety.
Conduct routine checks and follow the manufacturer’s troubleshooting guidelines. Regular maintenance of surge arresters helps prevent potential electrical failures. Refer to the following table to quickly identify and resolve potential issues:
Symptom |
Possible Causes |
Troubleshooting Methods |
Not Protective |
Surge arrester is too far from protected equipment |
Add a surge arrest device within 30m or shorten the distance between devices |
Loose or improper wiring |
Carefully strip and tighten connection screws |
|
Unreliable or high ground impedance |
Establish a reliable ground connection and reduce ground impedance |
|
Mismatched working voltage |
Replace the surge arrester with a model compatible with the protected equipment |
|
Persistent Tripping |
Frequent voltage spikes |
Investigate the source of electrical disturbances |
Overloaded circuit |
Evaluate and potentially redistribute electrical load |
|
Visual Damage |
Physical signs of wear or burn marks |
Immediate replacement required |
Conclusion
Successfully installing the NXU-IIG Surge Arrester requires precise preparation and methodical execution. The above-listed guidelines have presented all the key stages. These include disconnecting power and selecting appropriate tools. Then the next phase is mounting the device correctly and ensuring proper wiring and connections. At CHINT, we are committed to helping you protect your electrical systems with confidence. Our experts are always ready to provide the assistance you need to ensure a safe and successful installation. Visit our website to contact our customer support for expert assistance or additional guidance.